The Windows Operating System always had the ability to take screenshots. You can easily take screenshots by pressing the PrtScn (Print Screen) button. Once you press the PrtScn button, the screenshot will be copied; now you can save the screenshot in the Paint program.
Apart from the above method we have another method of taking screenshots on Windows 11. Window comes with the Snipping tool that helps the users to take screenshots.
In Windows 11 snipping tools contain features of the Snipping Tools and snip and sketch. Using this program, you can edit the screenshots using features like crop, and annotate in the application.
Using this application, you can take screenshots using the rectangle tool or free mode. You can also use a quick capture window or you can take a screenshot of the entire screen.
Below you will find a simple guide that will help you to take a screenshot with the snipping tool on Windows 11.
How to take screenshot with Snipping Tool on Windows 11:
Snipping Tool is a simple and easy to use tool. You can directly use the application for taking the screenshot or you can use a shortcut for taking the screenshot.
Take Screenshot with Snipping Tool:
For taking screenshot using Snipping you just have to follow the simple steps:
- Click on the Start button from the centre of the task bar.
- Search Snipping Tooland then Click on the Snipping Tool to launch the application.
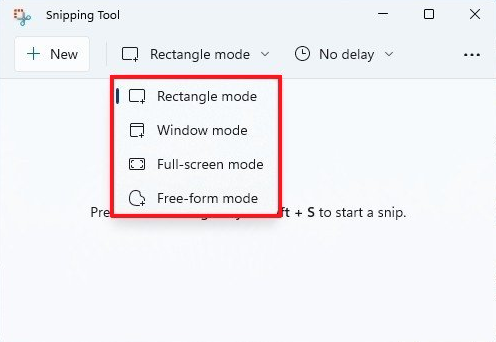
- Now you have to select the screenshot modes:
-
- Rectangle mode —Take Screenshot in rectangle shape using the mouse.
- Window mode —Take screenshot of current window.
- Full-screen mode —For taking screenshot of the full screen.
- Free-form mode —Take screenshot of the area you want.
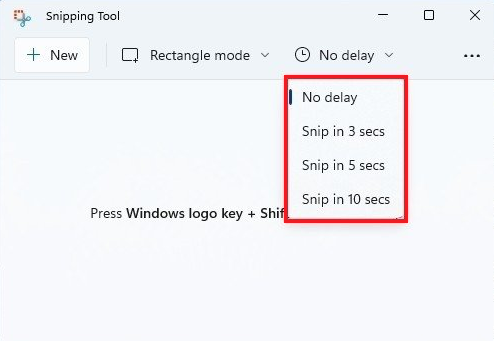
Note: you can also use the delay function in a 3,5,10 second interval. This function is used to take a screenshot of a particular action.
- Once the mode is selected you have to click on New

- Screenshot will be taken with the selected mode
Once the screenshot is taken you can now save it. Also, before saving it you can edit the screenshot.
Take Screenshot using snipping tool shortcut
If you do not want to take screenshots using the snipping tool directly then you can use the shortcut of the snipping tool to take a screenshot.
- On the keyboard press Windows key + Shift + S.
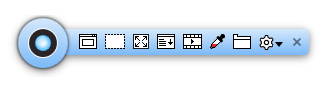
- Now you will see snipping tool bar at the top:
from the toolbar you can select Rectangle mode, Window mode, Full-screen mode, Free-form mode.

- Once the mode is selected you can take a screenshot according to the mode you have selected.
Once the screenshot is taken you can edit the screenshot and then save the screenshot.
That’s it, your screenshot will be saved.
Use TweakShot Screen Capture to take screenshot on Windows 11:
There are different tools available that will help you to take screenshots on Window 11.
Here we are using one of the best screenshots taking tools called TweakShot Screen Capture. TweakShot Screen Capture is a simple and easy to use screens capture tool that will help you to take a screenshot in Window 11.
TweakShot Screen Capture will also help you to record screens. It is a multipurpose tool using which you can take different types of screenshots.
After taking the screenshots you can edit them using the inbuilt editing tool. After taking the screenshot you can upload the screenshot on Cloud storages like Google Drive and Dropbox.

TweakShot Screen Capture is a simple tool with an intuitive user interface. You can place the program window anywhere you want on the desktop. On this simple user interface of the program, you will see all the buttons using which you can take screenshots and record videos.
TweakShot Screen Capture is one of the best snipping tools you can find.
You can use the steps below to take a screenshot using TweakShot Screen Capture.
First you have to download and install TweakShot Screen Capture from its official website.
Once the program is installed, launch the program.
Now from the program window you can select the screenshot you want to capture.
Once the scan mode is selected, take the screenshot.
Once the screenshot is captured, the picture editor window will open when the screenshot is selected.
Using this editor you can add text to the screenshot, add border, pixelate area of the screenshot, and other effects.
Once done you can save the screenshot.
Verdict:
Snipping tool in Windows 11 will help you to take screenshots and edit them. Snipping tool is a simple tool using which you can take different types of screenshots. You can use the shortcut of the snipping tool or you can use the whole program for taking the screenshot.
However, if you want to use another third-party program for taking a screenshot then we suggest you use TweakShot Screen Capture. TweakShot Screen Capture is a simple and easy to use program using which you can take a screenshot easily.